十五、面向切面编程AOP
写着写着代码就要想一下, 我们要不要面向切面 啊? 我们要不要面向切面啊?
IoC使软件组件松耦合。AOP让你能够捕捉系统中经常使用的功能,把它转化成组件。
AOP(Aspect Oriented Programming):面向切面编程,面向方面编程。(AOP是一种编程技术)
AOP是对OOP的补充延伸。
AOP底层使用的就是动态代理来实现的。
Spring的AOP使用的动态代理
JDK动态代理 + CGLIB动态代理技术。==Spring在这两种动态代理中灵活切换==,如果是代理接口,会默认使用JDK动态代理,如果要代理某个类,这个类没有实现接口,就会切换使用CGLIB。当然,你也可以强制通过一些配置让Spring只使用CGLIB。
1.切面
与业务逻辑不挂钩的业务代码。
15.1 AOP介绍
一般一个系统当中都会有一些系统服务,例如:日志、事务管理、安全等。这些系统服务被称为:**==交叉业务==**
这些==**交叉业务==**几乎是通用的,不管你是做银行账户转账,还是删除用户数据。日志、事务管理、安全,这些都是需要做的。
如果在每一个业务处理过程当中,都掺杂这些交叉业务代码进去的话,存在两方面问题:
- 第一:交叉业务代码在多个业务流程中反复出现,显然这个交叉业务代码没有得到复用。并且修改这些交叉业务代码的话,需要修改多处。
- 第二:程序员无法专注核心业务代码的编写,在编写核心业务代码的同时还需要处理这些交叉业务。
使用AOP可以很轻松的解决以上问题。
请看下图,可以帮助你快速理解AOP的思想:
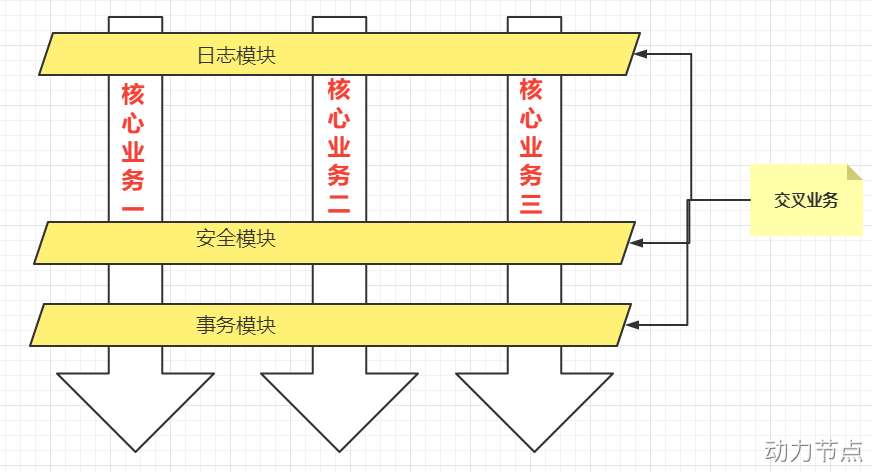
用一句话总结AOP:将与核心业务无关的代码独立的抽取出来,形成一个独立的组件,然后以横向交叉的方式应用到业务流程当中的过程被称为AOP。
AOP的优点:
- 第一:代码复用性增强。
- 第二:代码易维护。
- 第三:使开发者更关注业务逻辑。
15.2 AOP的七大术语
1
2
3
4
5
6
7
8
9
10
11
12
13
14
15
16
17
18
19
20
21
22
23
24
25
26
27
28
29
30
31
32
33
| public class UserService{
public void do1(){
System.out.println("do 1");
}
public void do2(){
System.out.println("do 2");
}
public void do3(){
System.out.println("do 3");
}
public void do4(){
System.out.println("do 4");
}
public void do5(){
System.out.println("do 5");
}
public void service(){
try{
do1();
do2();
do3();
do5();
}catch(Exection e){
throw new Exection(e);
}finally{
}
}
}
|
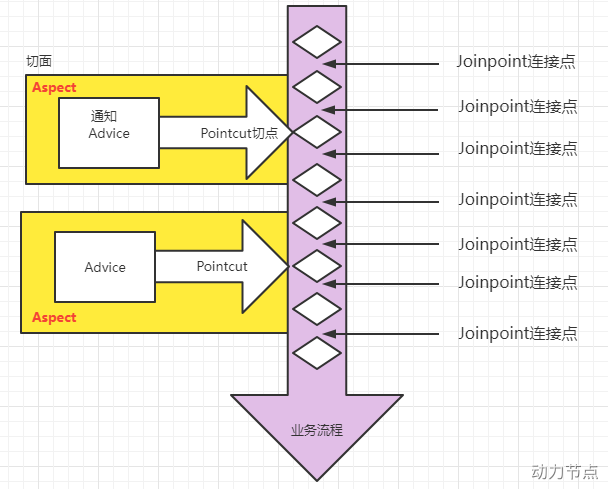
连接点 Joinpoint
- 在程序的整个执行流程中,可以织入切面的位置。方法的执行前后,异常抛出之后等位置。
切点 Pointcut
- 在程序执行流程中,真正织入切面的方法。(一个切点对应多个连接点)
通知 Advice
- 通知又叫增强,就是具体你要织入的代码。
- 通知包括:
- 前置通知 —>放在切点前
- 后置通知—>切点后
- 环绕通知 –>切点前后都有
- 异常通知 —>在 catch 异常中
- 最终通知 –>在 finally 中
切面 Aspect
-
织入 Weaving
-
代理对象 Proxy
-
目标对象 Target
-
通过下图,大家可以很好的理解AOP的相关术语:
15.3 切点表达式
切点表达式用来定义通知(Advice)往哪些方法上切入。
切入点表达式语法格式:
1
2
3
4
5
6
| execution([访问控制权限修饰符] 返回值类型 [全限定类名]方法名(形式参数列表) [异常])
带 [] 都是可选项。
全限定类名:带包名的类名,不填则为全部含有该方法的类。
|
访问控制权限修饰符:
- 可选项。
- 没写,就是4个权限都包括。
- 写public就表示只包括公开的方法。
返回值类型:
全限定类名:
- 可选项。
- 两个点“..”代表当前包以及子包下的所有类。
- 省略时表示所有的类。
方法名:
- 必填项。
- *表示所有方法。
- set*表示所有的set方法。
形式参数列表:
异常:
理解以下的切点表达式:
1
2
3
4
5
| execution(public * com.powernode.mall.service.*.delete*(..))
访问控制符为 public 返回类型为任意, 全类名为com.powernode.mall.service.下所有的类 ,方法名为 delete 形参列表为 任意
execution(* com.powernode.mall..*(..))
execution(* *(..))
|
15.4 使用Spring的AOP
Spring对AOP的实现包括以下3种方式:
- 第一种方式:Spring框架结合AspectJ框架实现的AOP,基于注解方式。
- 第二种方式:Spring框架结合AspectJ框架实现的AOP,基于XML方式。
- 第三种方式:Spring框架自己实现的AOP,基于XML配置方式。
实际开发中,都是Spring+AspectJ来实现AOP。所以我们重点学习第一种和第二种方式。
什么是AspectJ?(Eclipse组织的一个支持AOP的框架。AspectJ框架是独立于Spring框架之外的一个框架,Spring框架用了AspectJ)
AspectJ项目起源于帕洛阿尔托(Palo Alto)研究中心(缩写为PARC)。该中心由Xerox集团资助,Gregor Kiczales领导,从1997年开始致力于AspectJ的开发,1998年第一次发布给外部用户,2001年发布1.0 release。为了推动AspectJ技术和社团的发展,PARC在2003年3月正式将AspectJ项目移交给了Eclipse组织,因为AspectJ的发展和受关注程度大大超出了PARC的预期,他们已经无力继续维持它的发展。
15.4.1 准备工作
使用Spring+AspectJ的AOP需要引入的依赖如下:
1
2
3
4
5
6
7
8
9
10
11
12
13
14
15
16
17
18
|
<dependency>
<groupId>org.springframework</groupId>
<artifactId>spring-context</artifactId>
<version>6.0.0-M2</version>
</dependency>
<dependency>
<groupId>org.springframework</groupId>
<artifactId>spring-aop</artifactId>
<version>6.0.0-M2</version>
</dependency>
<dependency>
<groupId>org.springframework</groupId>
<artifactId>spring-aspects</artifactId>
<version>6.0.0-M2</version>
</dependency>
|
Spring配置文件中添加context命名空间和aop命名空间
1
2
3
4
5
6
7
8
9
10
| <?xml version="1.0" encoding="UTF-8"?>
<beans xmlns="http://www.springframework.org/schema/beans"
xmlns:xsi="http://www.w3.org/2001/XMLSchema-instance"
xmlns:context="http://www.springframework.org/schema/context"
xmlns:aop="http://www.springframework.org/schema/aop"
xsi:schemaLocation="http://www.springframework.org/schema/beans http://www.springframework.org/schema/beans/spring-beans.xsd
http://www.springframework.org/schema/context http://www.springframework.org/schema/context/spring-context.xsd
http://www.springframework.org/schema/aop http://www.springframework.org/schema/aop/spring-aop.xsd">
</beans>
|
15.4.2 基于AspectJ的AOP注解式开发
实现步骤
第一步:定义目标类以及目标方法
1
2
3
4
5
6
7
8
9
| package com.powernode.spring6.service;
public class OrderService {
public void generate(){
System.out.println("订单已生成!");
}
}
|
第二步:定义切面类
1
2
3
4
5
6
7
8
| package com.powernode.spring6.service;
import org.aspectj.lang.annotation.Aspect;
@Aspect
public class MyAspect {
}
|
第三步:目标类和切面类都纳入spring bean管理
在目标类OrderService上添加**@Component**注解。
在切面类MyAspect类上添加**@Component**注解。
第四步:在spring配置文件中添加组建扫描
1
2
3
4
5
6
7
8
9
10
11
| <?xml version="1.0" encoding="UTF-8"?>
<beans xmlns="http://www.springframework.org/schema/beans"
xmlns:xsi="http://www.w3.org/2001/XMLSchema-instance"
xmlns:context="http://www.springframework.org/schema/context"
xmlns:aop="http://www.springframework.org/schema/aop"
xsi:schemaLocation="http://www.springframework.org/schema/beans http://www.springframework.org/schema/beans/spring-beans.xsd
http://www.springframework.org/schema/context http://www.springframework.org/schema/context/spring-context.xsd
http://www.springframework.org/schema/aop http://www.springframework.org/schema/aop/spring-aop.xsd">
<context:component-scan base-package="com.powernode.spring6.service"/>
</beans>
|
第五步:在切面类中添加通知
1
2
3
4
5
6
7
8
9
10
11
12
13
14
| package com.powernode.spring6.service;
import org.springframework.stereotype.Component;
import org.aspectj.lang.annotation.Aspect;
@Aspect
@Component
public class MyAspect {
public void advice(){
System.out.println("我是一个通知");
}
}
|
第六步:在通知上添加切点表达式
1
2
3
4
5
6
7
8
9
10
11
12
13
14
15
16
17
18
| package com.powernode.spring6.service;
import org.aspectj.lang.annotation.Before;
import org.springframework.stereotype.Component;
import org.aspectj.lang.annotation.Aspect;
@Aspect
@Component
public class MyAspect {
@Before("execution(* com.powernode.spring6.service.OrderService.*(..))")
public void advice(){
System.out.println("我是一个通知");
}
}
|
注解@Before表示前置通知。
第七步:在spring配置文件中启用自动代理
1
2
3
4
5
6
7
8
9
10
11
12
13
| <?xml version="1.0" encoding="UTF-8"?>
<beans xmlns="http://www.springframework.org/schema/beans"
xmlns:xsi="http://www.w3.org/2001/XMLSchema-instance"
xmlns:context="http://www.springframework.org/schema/context"
xmlns:aop="http://www.springframework.org/schema/aop"
xsi:schemaLocation="http://www.springframework.org/schema/beans http://www.springframework.org/schema/beans/spring-beans.xsd
http://www.springframework.org/schema/context http://www.springframework.org/schema/context/spring-context.xsd
http://www.springframework.org/schema/aop http://www.springframework.org/schema/aop/spring-aop.xsd">
<context:component-scan base-package="com.powernode.spring6.service"/>
<aop:aspectj-autoproxy proxy-target-class="true"/>
</beans>
|
<aop:aspectj-autoproxy proxy-target-class=”true”/> 开启自动代理之后,凡事带有@Aspect注解的bean都会生成代理对象。
proxy-target-class=”true” 表示采用cglib动态代理。
proxy-target-class=”false” 表示采用jdk动态代理。默认值是false。即使写成false,当没有接口的时候,也会自动选择cglib生成代理类。
测试程序:
1
2
3
4
5
6
7
8
9
10
11
12
13
14
15
| package com.powernode.spring6.test;
import com.powernode.spring6.service.OrderService;
import org.junit.Test;
import org.springframework.context.ApplicationContext;
import org.springframework.context.support.ClassPathXmlApplicationContext;
public class AOPTest {
@Test
public void testAOP(){
ApplicationContext applicationContext = new ClassPathXmlApplicationContext("spring-aspectj-aop-annotation.xml");
OrderService orderService = applicationContext.getBean("orderService", OrderService.class);
orderService.generate();
}
}
|
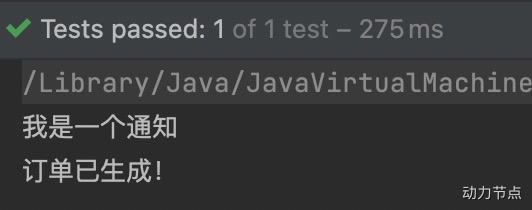
运行结果:
通知类型
通知类型包括:
- 前置通知:@Before 目标方法执行之前的通知
- 后置通知:@AfterReturning 目标方法执行之后的通知
- 环绕通知:@Around 目标方法之前添加通知,同时目标方法执行之后添加通知。
- 异常通知:@AfterThrowing 发生异常之后执行的通知
- 最终通知:@After 放在finally语句块中的通知
接下来,编写程序来测试这几个通知的执行顺序:
1
2
3
4
5
6
7
8
9
10
11
12
13
14
15
16
17
18
19
20
21
22
23
24
25
26
27
28
29
30
31
32
33
34
35
36
37
38
39
40
41
42
43
44
45
46
47
48
49
50
51
52
53
54
55
56
57
58
59
60
61
62
63
64
65
66
67
| package com.powernode.spring6.service;
import org.aspectj.lang.ProceedingJoinPoint;
import org.aspectj.lang.annotation.*;
import org.springframework.stereotype.Component;
@Component
@Aspect
public class MyAspect {
@Around("execution(* com.powernode.spring6.service.OrderService.*(..))")
public void aroundAdvice(ProceedingJoinPoint proceedingJoinPoint) throws Throwable {
System.out.println("环绕通知开始");
proceedingJoinPoint.proceed();
System.out.println("环绕通知结束");
}
@Before("execution(* com.powernode.spring6.service.OrderService.*(..))")
public void beforeAdvice(){
System.out.println("前置通知");
}
@AfterReturning("execution(* com.powernode.spring6.service.OrderService.*(..))")
public void afterReturningAdvice(){
System.out.println("后置通知");
}
@AfterThrowing("execution(* com.powernode.spring6.service.OrderService.*(..))")
public void afterThrowingAdvice(){
System.out.println("异常通知");
}
@After("execution(* com.powernode.spring6.service.OrderService.*(..))")
public void afterAdvice(){
System.out.println("最终通知");
}
}
package com.powernode.spring6.service;
import org.springframework.stereotype.Component;
@Component
public class OrderService {
public void generate(){
System.out.println("订单已生成!");
}
}
package com.powernode.spring6.test;

import com.powernode.spring6.service.OrderService;
import org.junit.Test;
import org.springframework.context.ApplicationContext;
import org.springframework.context.support.ClassPathXmlApplicationContext;

public class AOPTest {
    @Test
    public void testAOP(){
        ApplicationContext applicationContext = new ClassPathXmlApplicationContext("spring-aspectj-aop-annotation.xml");
        OrderService orderService = applicationContext.getBean("orderService", OrderService.class);
        orderService.generate();
    }
}
|
执行结果:
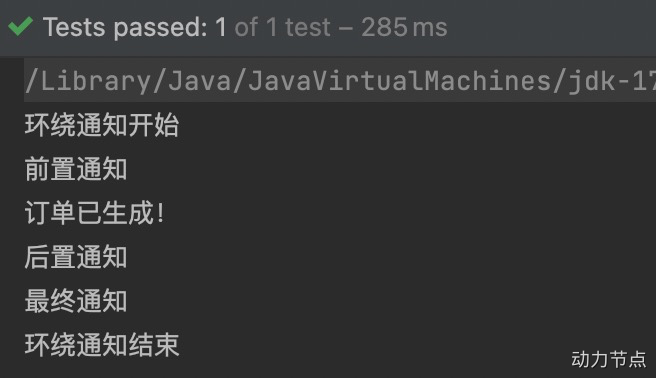
通过上面的执行结果就可以判断他们的执行顺序了,这里不再赘述。
结果中没有异常通知,这是因为目标程序执行过程中没有发生异常。我们尝试让目标方法发生异常:
1
2
3
4
5
6
7
8
9
10
11
12
13
14
15
| package com.powernode.spring6.service;
import org.springframework.stereotype.Component;
@Component
public class OrderService {
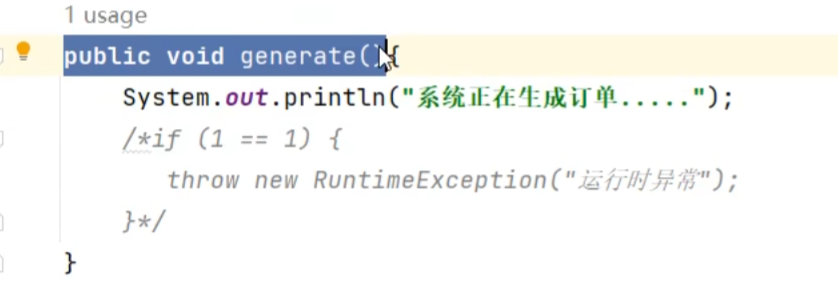
public void generate(){
System.out.println("订单已生成!");
if (1 == 1) {
throw new RuntimeException("模拟异常发生");
}
}
}
|
再次执行测试程序,结果如下:
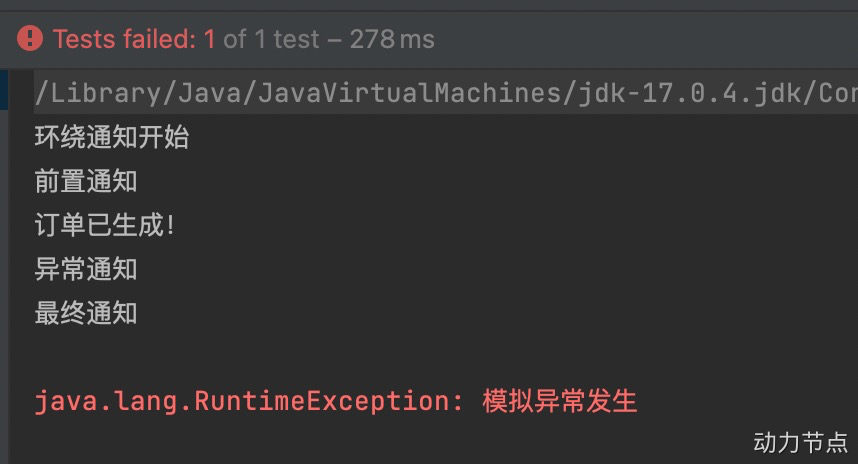
通过测试得知,当发生异常之后,最终通知也会执行,因为最终通知@After会出现在finally语句块中。
出现异常之后,后置通知和环绕通知的结束部分不会执行。
切面的先后顺序
我们知道,业务流程当中不一定只有一个切面,可能有的切面控制事务,有的记录日志,有的进行安全控制,如果多个切面的话,顺序如何控制:可以使用@Order注解来标识切面类,为@Order注解的value指定一个整数型的数字,数字越小,优先级越高。
再定义一个切面类,如下:
1
2
3
4
5
6
7
8
9
10
11
12
13
14
15
16
17
18
19
20
21
22
23
24
25
26
27
28
29
30
31
32
33
34
35
36
37
38
39
40
41
42
43
44
45
46
47
48
49
50
51
52
53
54
55
56
57
58
59
60
61
62
63
64
65
66
67
68
69
70
71
72
73
74
75
76
77
78
79
80
81
82
| package com.powernode.spring6.service;
import org.aspectj.lang.ProceedingJoinPoint;
import org.aspectj.lang.annotation.*;
import org.springframework.core.annotation.Order;
import org.springframework.stereotype.Component;
@Aspect
@Component
@Order(1)
public class YourAspect {
@Around("execution(* com.powernode.spring6.service.OrderService.*(..))")
public void aroundAdvice(ProceedingJoinPoint proceedingJoinPoint) throws Throwable {
System.out.println("YourAspect环绕通知开始");
proceedingJoinPoint.proceed();
System.out.println("YourAspect环绕通知结束");
}
@Before("execution(* com.powernode.spring6.service.OrderService.*(..))")
public void beforeAdvice(){
System.out.println("YourAspect前置通知");
}
@AfterReturning("execution(* com.powernode.spring6.service.OrderService.*(..))")
public void afterReturningAdvice(){
System.out.println("YourAspect后置通知");
}
@AfterThrowing("execution(* com.powernode.spring6.service.OrderService.*(..))")
public void afterThrowingAdvice(){
System.out.println("YourAspect异常通知");
}
@After("execution(* com.powernode.spring6.service.OrderService.*(..))")
public void afterAdvice(){
System.out.println("YourAspect最终通知");
}
}
package com.powernode.spring6.service;
import org.aspectj.lang.ProceedingJoinPoint;
import org.aspectj.lang.annotation.*;
import org.springframework.core.annotation.Order;
import org.springframework.stereotype.Component;
@Component
@Aspect
@Order(2)
public class MyAspect {
@Around("execution(* com.powernode.spring6.service.OrderService.*(..))")
public void aroundAdvice(ProceedingJoinPoint proceedingJoinPoint) throws Throwable {
System.out.println("环绕通知开始");
proceedingJoinPoint.proceed();
System.out.println("环绕通知结束");
}
@Before("execution(* com.powernode.spring6.service.OrderService.*(..))")
public void beforeAdvice(){
System.out.println("前置通知");
}
@AfterReturning("execution(* com.powernode.spring6.service.OrderService.*(..))")
public void afterReturningAdvice(){
System.out.println("后置通知");
}
@AfterThrowing("execution(* com.powernode.spring6.service.OrderService.*(..))")
public void afterThrowingAdvice(){
System.out.println("异常通知");
}
@After("execution(* com.powernode.spring6.service.OrderService.*(..))")
public void afterAdvice(){
System.out.println("最终通知");
}
}
|
执行测试程序:
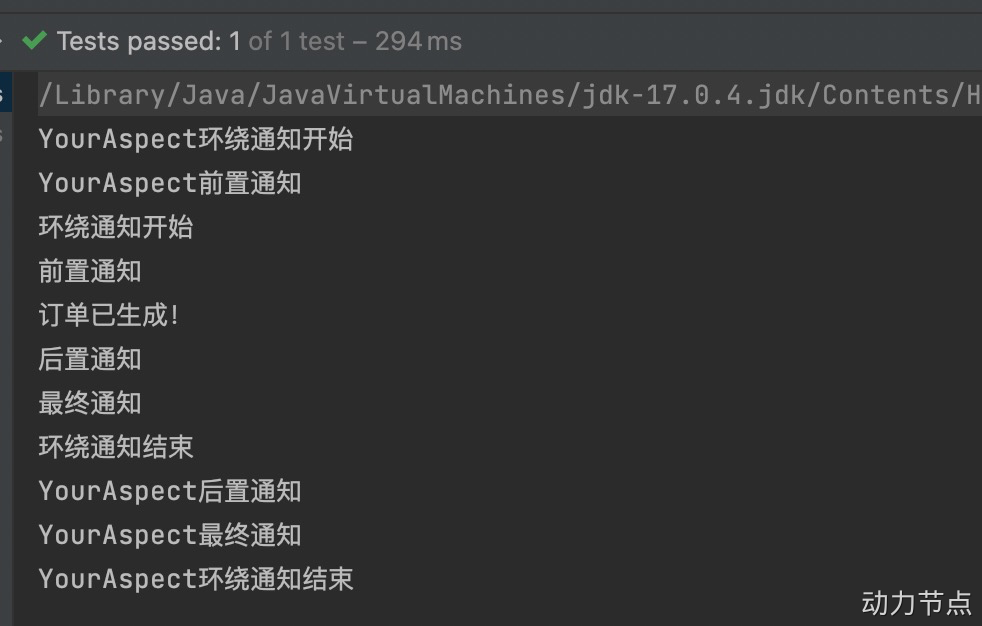
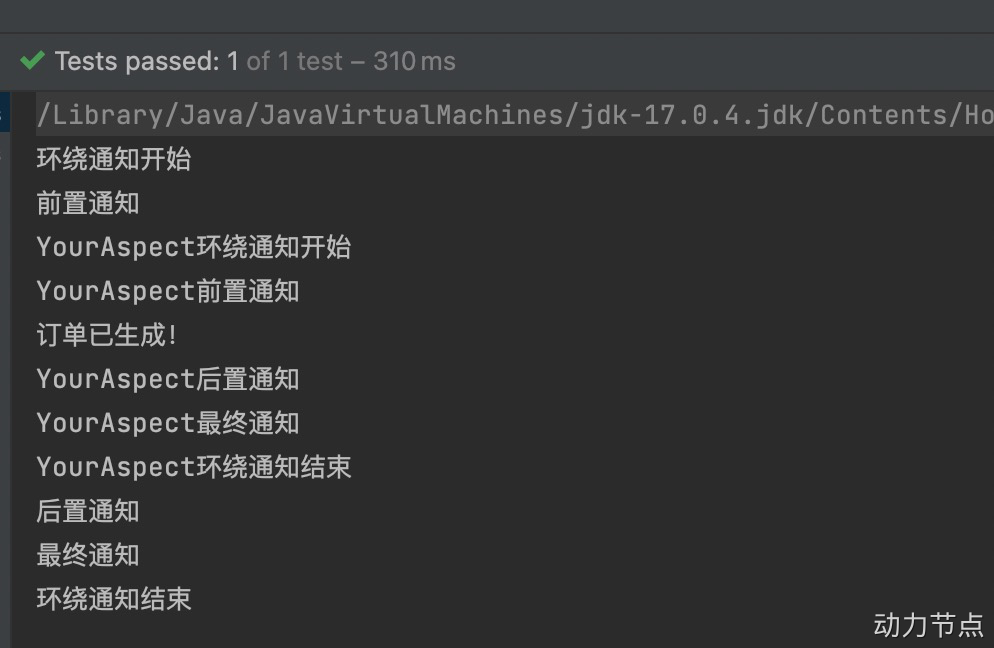
通过修改@Order注解的整数值来切换顺序,执行测试程序:
优化使用切点表达式
观看以下代码中的切点表达式:
1
2
3
4
5
6
7
8
9
10
11
12
13
14
15
16
17
18
19
20
21
22
23
24
25
26
27
28
29
30
31
32
33
34
35
36
37
38
39
40
41
42
| package com.powernode.spring6.service;
import org.aspectj.lang.ProceedingJoinPoint;
import org.aspectj.lang.annotation.*;
import org.springframework.core.annotation.Order;
import org.springframework.stereotype.Component;
@Component
@Aspect
@Order(2)
public class MyAspect {
@Around("execution(* com.powernode.spring6.service.OrderService.*(..))")
public void aroundAdvice(ProceedingJoinPoint proceedingJoinPoint) throws Throwable {
System.out.println("环绕通知开始");
proceedingJoinPoint.proceed();
System.out.println("环绕通知结束");
}
@Before("execution(* com.powernode.spring6.service.OrderService.*(..))")
public void beforeAdvice(){
System.out.println("前置通知");
}
@AfterReturning("execution(* com.powernode.spring6.service.OrderService.*(..))")
public void afterReturningAdvice(){
System.out.println("后置通知");
}
@AfterThrowing("execution(* com.powernode.spring6.service.OrderService.*(..))")
public void afterThrowingAdvice(){
System.out.println("异常通知");
}
@After("execution(* com.powernode.spring6.service.OrderService.*(..))")
public void afterAdvice(){
System.out.println("最终通知");
}
}
|
缺点是:
- 第一:切点表达式重复写了多次,没有得到复用。
- 第二:如果要修改切点表达式,需要修改多处,难维护。
可以这样做:将切点表达式单独的定义出来,在需要的位置引入即可。如下:
1
2
3
4
5
6
7
8
9
10
11
12
13
14
15
16
17
18
19
20
21
22
23
24
25
26
27
28
29
30
31
32
33
34
35
36
37
38
39
40
41
42
43
44
45
| package com.powernode.spring6.service;
import org.aspectj.lang.ProceedingJoinPoint;
import org.aspectj.lang.annotation.*;
import org.springframework.core.annotation.Order;
import org.springframework.stereotype.Component;
@Component
@Aspect
@Order(2)
public class MyAspect {
@Pointcut("execution(* com.powernode.spring6.service.OrderService.*(..))")
public void pointcut(){}
@Around("pointcut()")
public void aroundAdvice(ProceedingJoinPoint proceedingJoinPoint) throws Throwable {
System.out.println("环绕通知开始");
proceedingJoinPoint.proceed();
System.out.println("环绕通知结束");
}
@Before("pointcut()")
public void beforeAdvice(){
System.out.println("前置通知");
}
@AfterReturning("pointcut()")
public void afterReturningAdvice(){
System.out.println("后置通知");
}
@AfterThrowing("pointcut()")
public void afterThrowingAdvice(){
System.out.println("异常通知");
}
@After("pointcut()")
public void afterAdvice(){
System.out.println("最终通知");
}
}
|
使用@Pointcut注解来定义独立的切点表达式。
注意这个@Pointcut注解标注的方法随意,只是起到一个能够让@Pointcut注解编写的位置。
执行测试程序:
1.切点一个小细节
ProceedingJoinPoint 是专门使用在环绕方法(环绕切面)中的切点,
而 JoinPoint 可以使用在任意的切面中。(spring在调用 切面的方法时会自动传递一个 joinpoint 参数)
可以通过切点获得目标方法的签名。
a.ProceedingJoinPoint
1
2
3
4
5
6
7
| @Around("commonCut()")
public void Arround(ProceedingJoinPoint proceedingJoinPoint) throws Throwable {
System.out.println("环绕通知开始");
proceedingJoinPoint.proceed();
System.out.println("环绕通知结束");
}
|
b.JoinPoint
1
2
3
4
5
| public void before(JoinPoint joinPoint){
Signature signature = joinPoint.getSignature();
System.out.println("目标方法的方法名"+signature.getName());
System.out.println("前置通知");
}
|
目标方法的签名是什么? —->从修饰符开始,一直到方法名字。
全注解式开发AOP
就是编写一个类,在这个类上面使用大量注解来代替spring的配置文件,spring配置文件消失了,如下:
1
2
3
4
5
6
7
8
9
10
11
| package com.powernode.spring6.service;
import org.springframework.context.annotation.ComponentScan;
import org.springframework.context.annotation.Configuration;
import org.springframework.context.annotation.EnableAspectJAutoProxy;
@Configuration
@ComponentScan("com.powernode.spring6.service")
@EnableAspectJAutoProxy(proxyTargetClass = true)
public class Spring6Configuration {
}
|
测试程序也变化了:
1
2
3
4
5
6
| @Test
public void testAOPWithAllAnnotation(){
ApplicationContext applicationContext = new AnnotationConfigApplicationContext(Spring6Configuration.class);
OrderService orderService = applicationContext.getBean("orderService", OrderService.class);
orderService.generate();
}
|
执行结果如下:
15.4.3 基于XML配置方式的AOP(了解)

